Card Update

From "What Was I Thinking" to "Wow"....

I had a little time and didn't feel like doing a card from scratch.  But I have a pile of not-so-great cards that are in my "please redo me" stash.  This was one of them...


YUCK!  Right?  Right!  So, armed with my freebies from PaperWishes and Hot Off the Press*, I proceeded to unassemble the ugly card and give it a stylish update...


* If you click on the link, it takes you to the "freebies" section of the Paper Wishes website.  Click on each design and you can download a free pdf file that coordinates with that paper pack.  Thanks HOTP!!!

I resized and printed the label from here:


I printed 4 of the selected label on one page and cut out the layers.  Then I adhered them with foam tape to get a dimensional look:


Added a few little bling elements and ended up with a MUCH more appealing card (in my very humble opinion).

Well, that's my quick little post for today.  I hope you all have a very blessed Christmas.

Happy Crafting!

Sharpie Mug

FIT FOR A QUEEN!

Around my office, it's kind of a joke that I am the "Queen" (of everything).  Ok, so it's only a two-person office, but I still rule the roost.  Usually.  And since I am so spoiled (just ask anyone), I have all my "queenly" decorations around.

My parking space....

My window and door....


And my favorite mug....

....even though the fact that "different" should be "differently" (grammar check, people).  It's still my favorite mug.

But, when I came in to work on Monday, what did I find???


EGAD!!!!  A big ol' CHIP!!!!  Man!  I loved that mug!

It was a good thing I had been "Pinteresting" and found all the cute ideas on how to do a Sharpie mug...plus I had bought a couple of inexpensive mugs to try.  I like a BIG cup of coffee, so I need a BIG mug!  This one I had purchased for only a few dollars at Target.   


B O R I N G ! ! ! ! !   But fear not, my crafty colleagues....Have Sharpie and my trusty Cricut and some vinyl will travel....er, stay put in my craft room!  

I jumped into the Cricut Craft Room and found the crown I wanted.  I sized it to the size and shape I desired and cut it out on vinyl.  Transfer tape took it from the cutting mat to the mug and a little marking and doodling later....VOILA'!!!  My new favorite mug!  (Note:  Bake for 30 minutes in 350 degree oven to set the ink, and hand wash to keep it looking good.)


And no grammatical errors!  Oh, the ideas are spilling out of me now!  Look out...MUGS FOR EVERYONE! lol  

I hope I inspired you to try something new!

Happy Crafting!

Christmas Crafting

Christmas Crafting 101...

The past couple of evenings I have had the luxury of spending time in my craft room.  What a happy place!  Bright colors, lots of supplies, and glitter EVERYWHERE!!  

This first project (although no glitter was involved) is my first attempt at a bone pillow (don't be too harsh, lol)...


I was at a craft show in Tennessee this past week and wanted to purchase another bone pillow like the one I had purchased for hubby the year before.  The lady didn't want to make change for me because it would "take all her $5's"...guess she didn't have any $20's???  Grrrr.   Anyhow, her loss.  No sale.

Well...I've been wanting to get a sewing machine.  I have an embroidery machine, but it's a pain in the a** (PITA) to switch stuff around to go from embroidering to sewing.  So I wanted something to just sew!  And since my birthday is Saturday, I did what any intelligent wife would do....I bought myself the machine I wanted and told my hubby "Look what you got me for my birthday!!!".  Fortunately, he didn't even yell.  Just grumbled something about "that's all you're getting then" and went about his business.  Tee Hee....I love my present, Scotty!

Well, I brought home my Brother, unpacked it and set it up and set about making a pattern for this pillow (which I originally wanted to get for my boss for his "power naps").  First attempt mind you...it turned out soft and cuddly and not too shabby.  (Don't laugh too hard!)  Now I just have to make a few more for some gifts (and one for me!) and then I will move on to another project.  There's always another project.

Now, after my stencil class a couple of weeks ago (see previous post), I have been hooked on glitter and stencils and all things twinkly.  Generally for Christmas I come up with one design and mass produce.  This year, I'm making some very special one-of-a-kind cards for some very special one-of-a-kind people.  This is the second card I've done (the first is also in my previous post).  


I have had the pinecone stencil for a LOOOOOOOOONG time, but I was never happy with anything I tried with it.  Until the wonderful world of glitter, that is.  I have to thank (blame) Laura Drahozal from Dreamweaver Stencils and Kathy Mast at Altered Art Addicts for getting me hooked on this...Kathy for having the class and Laura for teaching it.  You have created a MONSTER!

Anywhoooo, I whipped out all my vats of glitter that I have been hoarding (and some new ones I may have purchased recently...again, the birthday thing) and got to playing.  I must say I really like how this card turned out.  The "Season's Greetings" stencil is a Dreamweaver one I recently acquired (yesterday :D ) and the snowflakes I've had for eons.  Some sort of confetti thing, I think.  I have a lot and manage to use a few each year on something.  Actually, with the exception of the one stencil and one or two (ok, three) new glitters, everything was from my stash. 

Here is a closeup of the most awesome twinkliness...(it's a word, I just made it up)...


Hopefully this evening I will have enough energy to finish another card I started yesterday and maybe get another one done.  At this rate, I may be ready to send cards out NEXT year!  LOL

So I leave you today with the wish for a day full of twinkliness.

Happy Crafting!


Dreamweaver Stencils

Dreamweaver Stencil Class Results


I was fortunate enough to attend a Dreamweaver Stencil class at my LSS, Altered Art Addicts, this weekend.  The class was taught by Dreamweaver Stencil's very talented design team member, Laura Drahozal (click here for her wonderful blog).  The cards you see above were the results of my interpretations of the techniques taught by Laura.  One wonderful class.  That's all it took...I was HOOKED!  

I had purchased stencils before....quite a few actually.  But was never really "into" how they were used.  That all changed yesterday.  I learned several new techniques that have converted me.

This first one is done with alcohol inks on thin metal sheets.  The stencil is used to emboss the image in a die cut machine (Cuttlebug, Sizzix, and the like) and then you blend alcohol inks onto the metal, sand, and mount.  Easy-peasy and what a delicious result!


This next card is done by machine embossing the stencil onto multiple colored sheets of the metal, then cutting strips and "reassembling" the design.  Then it was sanded, trimmed and mounted.  This technique took a little longer but the result was beautiful!


The next one was a very fun technique using the stencil with the Dreamweaver Embossing Paste.  The stencil was placed on acetate and the paste applied (reminded me of spackling the walls, lol).  It was then glittered with fine glitter.  Then the alcohol inks were applied to the reverse side of the acetate.  I love how gorgeous this turned out!  The marbling of the alcohol inks on the background really stand out and look amazing!


But this one, by far, was my favorite!!!!  It's like "painting" with glitter!  Who doesn't love glitter!  It's shiny and twinkly and mystical!  You begin by using two sided sticky paper and placing your stencil on it.  Then by using tiny bits of glitter (a little goes a really long way) you sprinkle and blend the different areas with your chosen colors.  Then you remove the stencil and cover the remainder of the design with the white glitter.  The picture doesn't even do it justice.  


So after the class was finished, naturally I had to add some supplies to my already obnoxious craft collection.  Loaded with some metal sheets and two-sided sticky paper, some new colors of glitter, a new stencil, a couple of neat Dreamweaver tools, and a newfound sense of craft divaness (is divaness a word?), I headed home to my "craproom" as my granddaughter calls it, and spread all my new "stuff" all over so I could play...er, create.  A short time later, Voila!


I am in LOVE with the results!  Granted, I am not doing this card for EVERYONE on my mailing list cuz, well, I just don't have that kind of time available (I have to work for a living...my family likes food and a roof over their head and I like to be able to buy my toys...er, tools...).  But there are a few special ones who will receive this labor of love.  Just look at this closeup of the finer details..... ooooh....aaaaah.  


So if you get the notion to check out these amazing stencils, I highly suggest you visit these links: Dreamweaver Stencils and Remembering Life's Moments.  You will find lots of inspiration, ideas and instructions.  I would love to see what you come up with!

Happy Crafting!

Sometimes I Amaze Myself!

No really! 

My project idea actually turned out better than I imagined.  Even with all my procrastination.  You see, I needed to do a wedding gift (well I didn't really NEED to since I handmade all their wedding invitations).  I would much rather make something personalized than spend money on something that someone else might get them.  Ok, I admit it.  I like to be special.  lol  But I digress.....

This gift is for a wedding TOMORROW.  I just started it TODAY.  Yeah, I have a little problem with timelines.  But at my age, I probably ain't gonna change now.

So, with an idea in my head, some vinyl in hand and my computer and Cricut by my side...I ventured into my creative stupor.  And, lo and behold, SUCCESS!!  Here are my ooooh and aaaahh pictures...


Pretty cool, eh?  I had purchased a couple of shadowbox frames at Michael's one day when they were on sale, just knowing I would come up with a project to use them on. Turns out, this was the perfect project.  

After I cut the background letters out using the Gypsy Font cartridge, they were still a little plain even with the fancy swirls.  So I grabbed some glittery Stickles and added a few highlights.  Just what it needed!  I put the frame together and added the couple's first name and wedding date to the front of the glass on the frame.  I love how it gives it such dimension.  And the good part is, it will be easy to clean and the neutral colors will go with most any decor.

So...I would love to hear what you think.  If you do any kind of personalized gifts, I would love to hear about them.  Feel free to share!!

Until next time....keepin' my fingers inky and my Cricut chirpin'!

Hanging Business Card Holder

Bulletin Board Business Card Holder

I know I have been MIA for quite a while.  Life sometimes gets in the way.  But I couldn't resist sharing this little pattern with you.  

I have several different piles of OPBCs (other people's business cards) on my desk and wanted a way to display them without having to put money into someone else's advertising.  So I came up with this simple and effective Business Card Holder to pin on the bulletin board.


As I was planning the layout/dimensions, I got to thinking how handy this would be to do for myself (fancier of course) to put my business cards in various places.  So after I got my measuring, cutting and scoring down to a very simple science, I set out to do a couple of fancy ones for MY business cards.  But first, here are the steps to get the basic one done.


Cut a piece of cardstock to 7.5" x 4.75".


Score vertically at .5" and 4.25".


Rotate and score at 1.5" and 2".  Then score at 3.5" only from the top to the score line and the bottom to the score line.


This is what it should look like after scored.

Now just a little trimming....Snip on the 3.5" score line only 1/2" to the vertical score line.  Do the same thing on the other side.  Then snip on the score lines over to the 1/2" score line on the 2" and 1.5" lines.  


It should look like this when you're done cutting.


Next, add adhesive to the top two tabs on each side.


And fold on the score lines and stick the sides together.


And there you have it!


Now, here is one I have done for MY business cards.  


I love how it turned out and as I look at it, I can see other ways to use it as well.  It could be hung from the bottom of a flier or poster.  Or the top could be scored and folded backwards as a stand so it could sit on your desk.  A hole could be punched at the top and it could be hung on a pin, hook, or magnet.

I hope this comes in handy for some of you.  I would love to see what you've done using this pattern.

Happy crafting!  Until next time, keepin' my fingers inky and my Cricut chirpin'!

Crafty Springtime

I finally had a whole weekend off and got to do a little playing in my craft room.  That is always so refreshing for me.  After doing a little reorganizing (seems I do as much of that as I do actual crafting), I made a couple of business card cases and some crafty business cards.

Last year, I had come across these Meijer gift card tins in the clearance aisle.  They were orignally 99 cents but were marked down to 49 cents.  When I checked out, they rang up as 10 cents!  I knew I would figure out a use for them at some point.
This weekend, my husband asked me if I had any sort of business card holder.  LIGHTBULB!!!!  Why, yes I do!!!  Give me a minute.....
Kept it simple and not to frilly.  I used vinyl to cover the lid, some vinyl letters, and some silver stickers for the corners.  Not too bad.  Except, now I want one!!  If I could go from one to the other so easily....
...surely I could whip one up for myself.  And while I'm at it, I think I'll do some handmade business cards.  (Thanks for the inspiration, paperboutique.blogspot.com).  So, a short time later, my case was vamped and my business cards were created!
I made eight cards using Microsoft Word and printed them on some yellow cardstock.  Then I found a complementary paper and cut the strips for the top, glued on some purple ribbon and added a little bling (what girl doesn't love a little bling!).  I can't wait to make another batch.  I'm thinking.....PINK!  I'll be sure to post what I come up with.  These were so much fun to make!

Until next time, keeping my fingers inky and my Cricut chirpin'!

PUBLISHED AGAIN!!!

So, I went to the mailbox yesterday and there was the Spring issue of Just Cards! magazine.  I'm thinking to myself, "hmmm...I don't remember ordering this one."  Well, to my utter surprise and enjoyment, when I opened it up, there was the letter saying "enjoy your complementary copy...you've been published".  Wow!  Uber-excited is an understatement!  Here's the spread....
 I absolutely LOVE seeing my name in print!  .....I'd like to thank the academy..... lol
 And here's the card.  I had just received it back from the publisher about a week ago.  I was a little disappointed but I understood...they receive tons of submissions all the time.
Well, I'm off to make some more cards!  Got the juices flowing!!!

Until next time, keepin' my fingers inky and my Cricut chirpin'!

NEW CARDS

I have been trying some new things.  I joined a couple of card swap groups and began doing some exchanges.  I am loving it!  I am getting cards from all over the world.  

Here are some of the cards I have created...

This one is an alcohol ink background.  I loved how the bright yellow spot looked like a sun.  
 Here is a birthday card I made for my "stash on hand".

 I always decorate the insides of my cards now.  It gives them a professional, finished look. (And uses up some of the leftover scraps from the front!)
 This was for a B&W challenge.  It is the debossed (rather than embossed) side of the cardstock.  I added some Stickles for a little twinkle.
 The flower on this card was stamped on mulberry paper.  I had never actually stamped on that type of paper before.  I generally used it as accent paper or background.  I love how it turned out.


 This was a card that needed to include "I".  I chose "inspiration" and "irridescence".


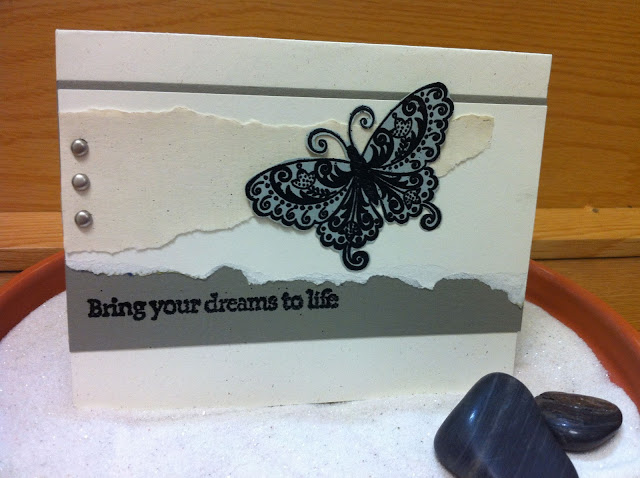
 These were for a torn papers background.

 I used fine glitter accents.  Not too bad for a first try with that technique.
Hopefully I will be spending some quality time in my craft room this weekend.  Need to finish up a few cards and a few commissioned gifts.  Maybe I'll even get another post out for next week!

Until next time, keepin' my fingers inky and my Cricut chirpin'.

Sketch Saturday #746

Hi, stampin' peeps! Can you believe it's March 9th already? Not sure where February went, but here we are with Spring just around th...