I have a super simple card to share with you today using two stamps from Technique Junkies: Art of God and Sand Dollars.
I used a kraft A2 card base and added a panel stamped, embossed and highlighted with Wink of Stella. I then stamped and die cut the sentiment and added a few drops of Nuvo Crystal Drops for pearl accents.
Simple, yet elegant. If you are interested in these stamps (and many others) and products, you can save 10% using this code:
Til next time,
Keepin' it inky!
Showing posts with label cards. Show all posts
Poppies. Poooooooopppppiiiieeeeessss.
Welcome back, stamping friends!
Every time I hear the word poppies, I flash to Wizard of Oz and the witch with her crystal ball. You can hear it now, too, can't you! Well, with all the flowers starting to bloom, I was inspired to use the Large Poppies Stamp from Technique Junkies. Another TJ Stamp, Love and Laughter Floral, added the perfect sentiment.
To make this card, I cut a white panel of Neenah cardstock to 4"x5.25". I stamped and heat embossed the poppies using Versamark and black embossing powder. I grabbed my beautiful mica paints and added some shimmery, shiny color to the flowers and set it aside to dry. On a black piece of cardstock, I stamped and embossed the sentiment using Versamark and coral embossing powder. (Hint: this stamp is one large stamp with a floral and sentiment. I took my scalpel and separated the verse from the flower so I could use them independently of each other.) Using some foam adhesive, I mounted the black panel to the poppies background, and attached that to a black A2 card base.
IRL, the poppies are so shiny and gorgeous. I hope you are inspired to try playing with your stamps today. If you like the stamps I've used, they are available through Technique Junkies. And if you'd like to save 10%, I can help you out!
Happy shopping. Happy stamping.
Til next time,
Keepin' it crafty!
Every time I hear the word poppies, I flash to Wizard of Oz and the witch with her crystal ball. You can hear it now, too, can't you! Well, with all the flowers starting to bloom, I was inspired to use the Large Poppies Stamp from Technique Junkies. Another TJ Stamp, Love and Laughter Floral, added the perfect sentiment.
To make this card, I cut a white panel of Neenah cardstock to 4"x5.25". I stamped and heat embossed the poppies using Versamark and black embossing powder. I grabbed my beautiful mica paints and added some shimmery, shiny color to the flowers and set it aside to dry. On a black piece of cardstock, I stamped and embossed the sentiment using Versamark and coral embossing powder. (Hint: this stamp is one large stamp with a floral and sentiment. I took my scalpel and separated the verse from the flower so I could use them independently of each other.) Using some foam adhesive, I mounted the black panel to the poppies background, and attached that to a black A2 card base.
IRL, the poppies are so shiny and gorgeous. I hope you are inspired to try playing with your stamps today. If you like the stamps I've used, they are available through Technique Junkies. And if you'd like to save 10%, I can help you out!
Happy shopping. Happy stamping.
Til next time,
Keepin' it crafty!
Technique Junkies March New Release Blog Hop
Happy March, Inky Friends!
It's a new month with some new inspiration! I am loving the March new releases from Technique Junkies. And I'm excited to share some projects with you featuring some of the new stamps. All new releases for March are available through Technique Junkies. Order by March 8, 2017 and receive a 15% discount (discount will be reflected in your cart at checkout...no code needed).
If you have arrived from the very talented and creative Kathy Stacy, you are on the right track! If not, you may want to start at the beginning of the hop (HERE) so you don't miss any of the awesome creativity the Design Team has to share.
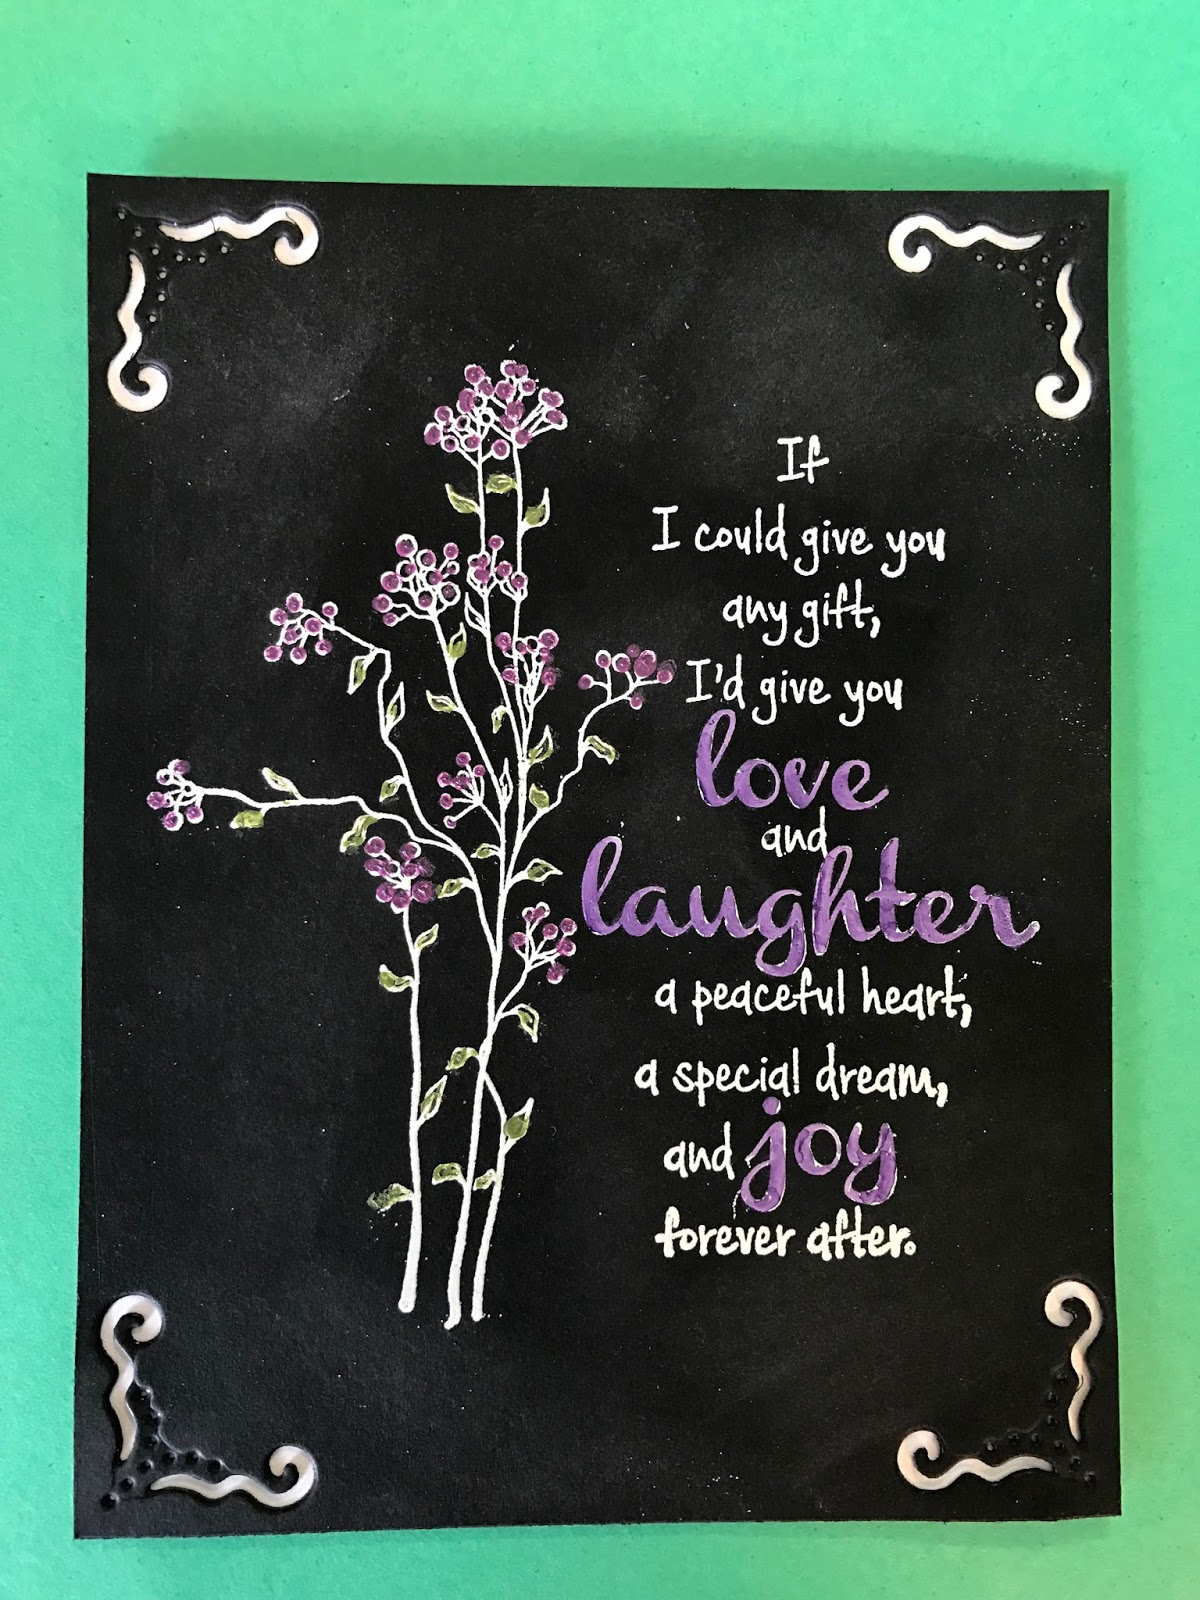
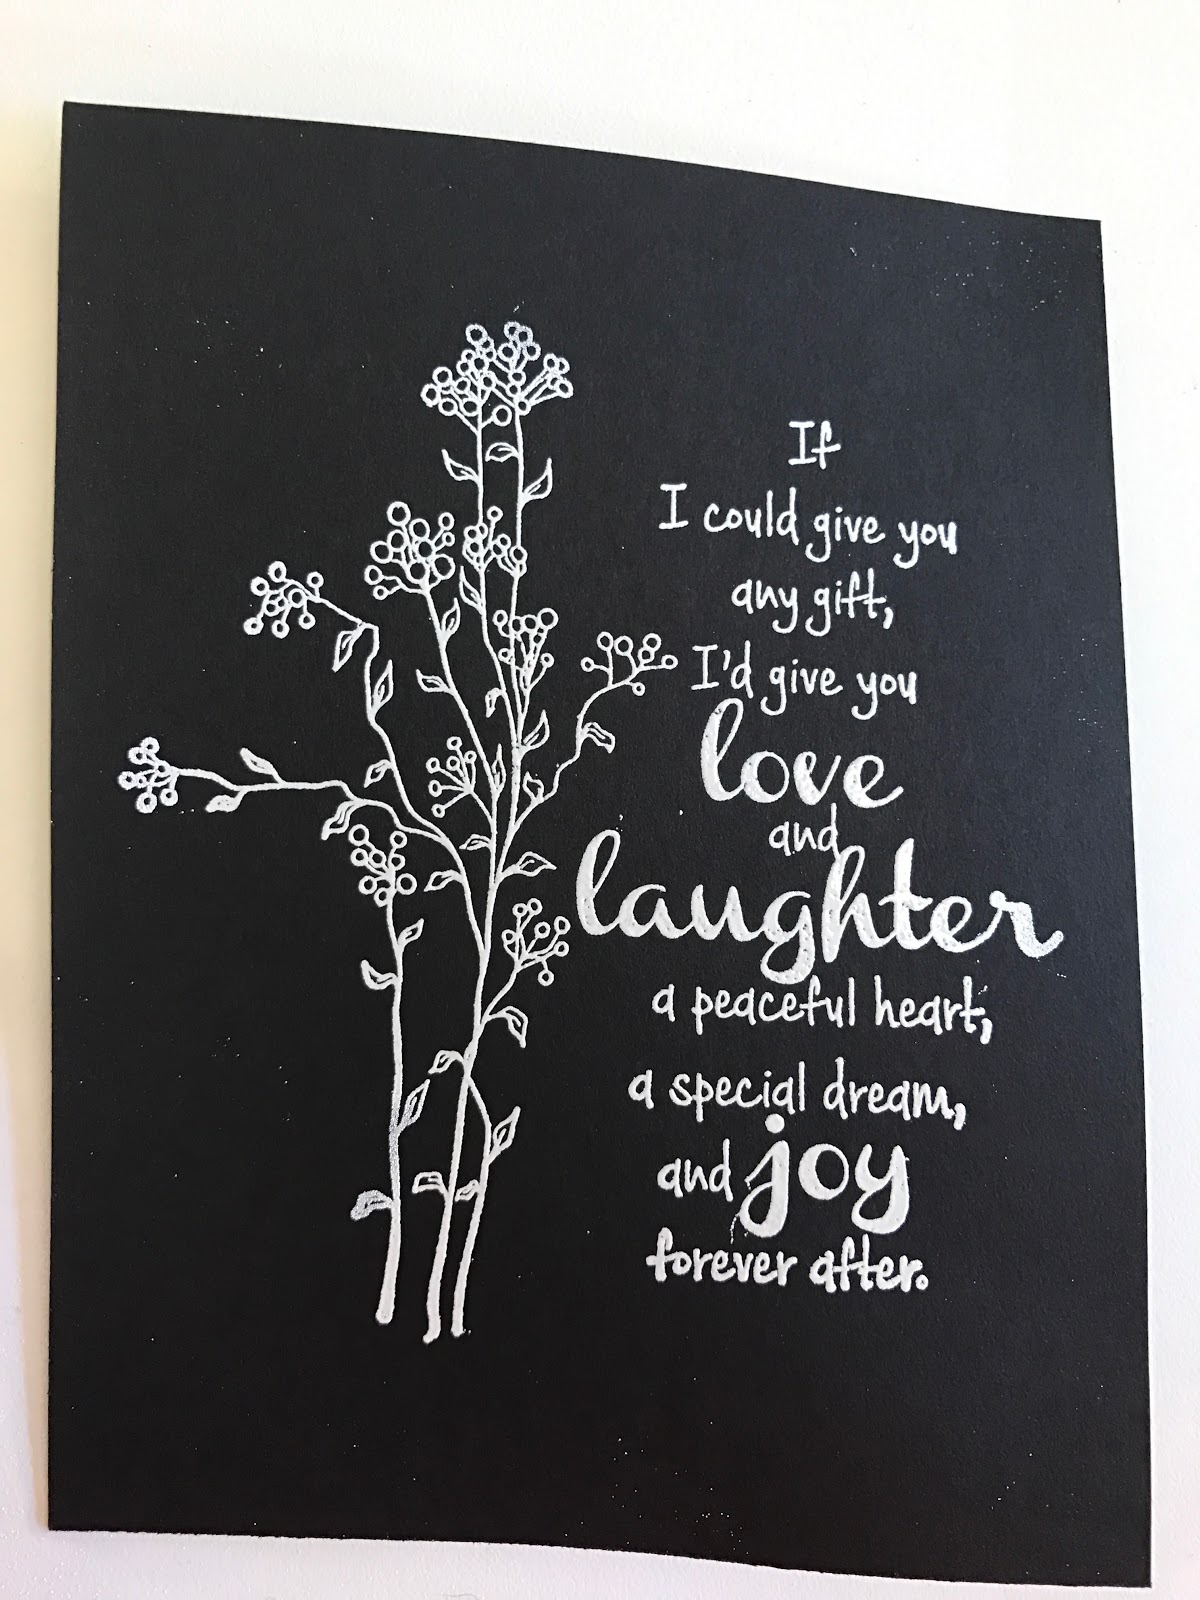
| Love and Laughter Floral |
Start with black cardstock cut to size.
Using Versamark ink, stamp Love and Laughter, then emboss with white embossing powder.
I used a Spectrum Noir marker to color in the words.
I then used Nuvo Crystal Drops to add color to the petals and leaves.
Then, simply take a makeup sponge and rub it on a piece of chalk.
Pounce onto the black cardstock adding the chalky film.
I then added some cutouts to the corners to frame the piece.
Happy Planner Page
| Coffee Barcode (SD765) & Coffee Kitty (SD735) |
I simply stamped that adorable Coffee Kitty on the corner of my planner with Versamark.
I then embossed with black embossing powder and colored with Spectrum Noir markers.
The Coffee Barcode was stamped with Memento Tuxedo Black.
Note on the upper right, I used Coffee Gauge (SD703).
Welcome Sweet Baby
| Welcome Sweet Baby |
I cut out the step card using my Silhouette Cameo.
I then added some pink floral cardstock to the sides and bottom, along with some sparkly adhesive ribbon and buttons.
The booties image was stamped twice: once on the card base and again on a separate piece, which was then trimmed out.
The trimmed booties were then foam-taped to the base image.
I stamped two of the sentiments from the set, Welcome Sweet Baby.
The Welcome piece was diecut and matted with some white cardstock.
I wrapped a pink ribbon around the corner and adhered it to the card.
On the inside, I stamped the third sentiment from the set.
Buddies
| Buddies |
I am absolutely IN LOVE with this stamp!!! It is such a wonderful graphic, that I didn't even do much to it. It's so cute it just shines all on it's own! I simply stamped Buddies on some brown cardstock using Memento Tuxedo Black ink. I trimmed it down and adhered it to the kraft card base with some foam tape. The sentiment is from the set Dog Quotes (S137). This will make a great masculine birthday card!
Hope you are enjoying the "hop"! Your next stop will be the wonderfully clever Beth Norman. Here is the complete line-up in case you missed someone:
Design Team Blog: http://techniquejunkies.blogspot.com
Lanette Erickson: http://stacksofscraps.blogspot.com
Cheri Weston: http://stampnboomer.blogspot.com
Kathy Stacy: https://craftynurse4u.wordpress.com/
Cheri Weston: http://stampnboomer.blogspot.com
Kathy Stacy: https://craftynurse4u.wordpress.com/
Beth Norman: http://www.sunflowers-dragonflies.ca
Pam DeChellis: http://journeyawakensthesoul.blogspot.com/
Judy Jackson: http://judysstampart.blogspot.com
Pat Huntoon: http://patstamps.blogspot.com
Til next time,
Keepin' It Inky!
Technique Junkies February Blog Hop
I am so excited to show you some of the new February Releases for Technique Junkies. There are fifteen new stamps, and I'm going to highlight seven of them (plus an oldie). All the new releases can be seen H E R E and will be discounted 15% through February 8, 2017. No need for a code. The discount will be reflected at checkout.
If you have arrived here from The Crafty Nurse Blog, you are on the right track. If not, you may want to start at the beginning (Technique Junkies) so you don't miss any cool stuff! Let's get going!
Project: Sarcasm Magnet
Featured Stamp - Sarcasm.
Supplies Used: Tan cardstock, Cork, Brown Embossing Powder, Vversamark Pad, Square Die, Magnet
Assembly: Stamp and emboss the sentiment on diecut cardstock. Adhere to the cork. Attach a magnet to the back. (Pretty simple, eh?)
Supplies Used: White cardstock, Purple Patterned Paper, Ribbon, Clear Label with Printed Sentiment, Black cardstock, Vellum, Versamark pad, Clear Embossing Powder, Purple Ink Stamp Pad, Lavendar Mica Powder, Adhesive Rhinestones, Silver Cardstock, Silver Embossing Powder
Assembly: Cut purple cardstock and attach to card front. Stamp and emboss the silver panel and attach to card. On Vellum, stamp and emboss the image. Die cut to oval shape. Die cut black cardstock using two oval dies to create a frame. Versamark frame and add Lavender Mica Powder. Attach vellum panel to back of frame, and attach that to the front of the card. Add rhinestones to image and frame. Add computer-journaled sentiment to piece of ribbon and add to card front.
Project: Journey Card
Assembly: Create card base from Kraft cardstock. Trim vellum, then stamp and emboss the background. Attach that to the card base and line with vinyl border. Attach the sentiment diecut to some blue cardstock and attach that to the card front using foam tape.
Project: Peaceful Card
Assembly: Create card base from Kraft cardstock. On white cardstock, stamp and emboss the image. Color with colored pencils and add Gamsol using a cotton swab to smooth out the pencil lines and blend the colors. Fussy-cut the image and attach to a trimmed piece of patterned cardstock. Add a tan mat and attach that to the front of the card using foam tape. Stamp part of the sentiment on a tan piece of cardstock, trim and attach that to the front of the card with foam tape. On the inside of the card, stamp the rest of the sentiment. Add gold dots and vinyl border to front of card.
Project: Travel Card
Assembly: Create card base from white cardstock and add a black mat t the ront. Mat the sentiment diecut to black cardstock and attach that to the front of the card. Add the airplane diecut to the front using foam tape. Attach a couple of black dots for embellishments.
Project: End of Your Rope Card
Assembly: Create card base using Kraft cardstock. Stamp and emboss the sentiment. Punch holes at the top and bottom of each rope section. Tie a knot in a piece of twine and thread through the holes. Glue the knot down and tape the twine on the reverse side. Add patterned paper to card base and attach the sentiment piece using foam tape. Add the fiber ribbon and wood beads.
Hope you enjoyed the projects and found some new inspiration. Maybe even some new favorite stamps! Next up on the Blog Hop is the very talented Beth Norman. Here is the complete line-up in case you missed someone:
Til next time,
Keepin' It Inky!
Assembly: Cut purple cardstock and attach to card front. Stamp and emboss the silver panel and attach to card. On Vellum, stamp and emboss the image. Die cut to oval shape. Die cut black cardstock using two oval dies to create a frame. Versamark frame and add Lavender Mica Powder. Attach vellum panel to back of frame, and attach that to the front of the card. Add rhinestones to image and frame. Add computer-journaled sentiment to piece of ribbon and add to card front.
Project: Journey Card
Featured Stamp - Travel Love
Supplies Used: Kraft cardstock, Vellum, Embossing Powder, Versamark, Printed Diecut, Blue cardstock, Vinyl Border, Foam TapeAssembly: Create card base from Kraft cardstock. Trim vellum, then stamp and emboss the background. Attach that to the card base and line with vinyl border. Attach the sentiment diecut to some blue cardstock and attach that to the card front using foam tape.
Project: Peaceful Card
Featured Stamps - Beautiful Strength (new) and Feng Shui
Supplies Used: Kraft cardstock, Patterned paper, Tan cardstock, White cardstock, Embossing powder, Vellum, Black stamp pad, Gold adhesive rhinestones, Colored pencils, Gamsol (or paint thinner or baby oil)Assembly: Create card base from Kraft cardstock. On white cardstock, stamp and emboss the image. Color with colored pencils and add Gamsol using a cotton swab to smooth out the pencil lines and blend the colors. Fussy-cut the image and attach to a trimmed piece of patterned cardstock. Add a tan mat and attach that to the front of the card using foam tape. Stamp part of the sentiment on a tan piece of cardstock, trim and attach that to the front of the card with foam tape. On the inside of the card, stamp the rest of the sentiment. Add gold dots and vinyl border to front of card.
Project: Travel Card
Featured Stamp - Fly Me Away
Supplies Used: White cardstock, Black cardstock, Patterned paper, Airplane diecut, Foam tape, Black dotsAssembly: Create card base from white cardstock and add a black mat t the ront. Mat the sentiment diecut to black cardstock and attach that to the front of the card. Add the airplane diecut to the front using foam tape. Attach a couple of black dots for embellishments.
Project: End of Your Rope Card
Featured Stamp - End of Your Rope
Supplies Used: Kraft cardstock, Twine, Wood grain patterned paper, Fiber ribbon, Wooden beaads, Copper embossing powder, Versamark, Foam tape, Paper punchAssembly: Create card base using Kraft cardstock. Stamp and emboss the sentiment. Punch holes at the top and bottom of each rope section. Tie a knot in a piece of twine and thread through the holes. Glue the knot down and tape the twine on the reverse side. Add patterned paper to card base and attach the sentiment piece using foam tape. Add the fiber ribbon and wood beads.
Hope you enjoyed the projects and found some new inspiration. Maybe even some new favorite stamps! Next up on the Blog Hop is the very talented Beth Norman. Here is the complete line-up in case you missed someone:
Design Team Blog: http://techniquejunkies.blogspot.com
Lanette Erickson: http://stacksofscraps.blogspot.com
Cheri Weston: http://stampnboomer.blogspot.com
Kathy Stacy: https://craftynurse4u.wordpress.com/2017/02/01/technique-junkies-february-blog-hop/
Ro Donner (ME): http://rodonner.blogspot.com/
Beth Norman: http://www.sunflowers-dragonflies.ca
Pam DeChellis: http://journeyawakensthesoul.blogspot.com/
Judy Jackson: http://judysstampart.blogspot.com
Pat Huntoon: http://patstamps.blogspot.com
Lanette Erickson: http://stacksofscraps.blogspot.com
Cheri Weston: http://stampnboomer.blogspot.com
Kathy Stacy: https://craftynurse4u.wordpress.com/2017/02/01/technique-junkies-february-blog-hop/
Ro Donner (ME): http://rodonner.blogspot.com/
Beth Norman: http://www.sunflowers-dragonflies.ca
Pam DeChellis: http://journeyawakensthesoul.blogspot.com/
Judy Jackson: http://judysstampart.blogspot.com
Pat Huntoon: http://patstamps.blogspot.com
Til next time,
Keepin' It Inky!
So, I thought I'd play along with the Unity Stamps sketch and color challenge this month. I have a TON of Unity Stamps. It was fun taking them out and looking at them all to see which ones I wanted to use for this project. This is what I came up with!
Here is the sketch and the color selection from Unity:
I really love the color combo and how cute the embossed pumpkins look on this card. If you'd like to play along, click on the Unit Stamps link abaove!
Til next time, keepin' it crafty!
Break is Over!
Did You Miss Me?
I'm baaaaccckkkkk with four new cards designed from Card Sketches I found on the blogisphere! Here are the cards:
The first one is probably my favorite. Mahalo! This is from the Paper Craft Crew Card Sketch #56 (PCCCS56).
It's the perfect sketch to use some of those "inchies" I've had for, like, forever! I also used the palm tree from Balmy Breezes (Stampin' Up) and made my own word stamp using the letters from a new Mama Elephant set called Bella Letters.
Next up is Happy Birthday. This was derived from Paper Craft Crew Card Sketch #55 (PCCCS55).
I love the little piece of vellum which just softens the background. I used a vellum tag for the sentiment and added some black "bling" for a little pop!
This next one, Sending Good Thoughts, is from Sketch #119 over at the Atlantic Hearts Challenge Blog.
Very simple card. Doesn't take a lot of supplies and comes together quickly.
And the final card is Woof! This sketch is from the August 2015 Week 1 Sketch at Viva La Verve.
I saw the background paper in a pad and it just cried bandana and denim. The dog is from You Make My Tail Wag (My Favorite Things), and the pocket is a very old stamp that I bought so many years ago, I don't even know the manufacturer. But I love it. The inside of the card says "Be the person your dog thinks you are."
Here are the four sketches in case you want to play along!
I hope to be back soon with some more inspiration. I have a couple more new sketches I want to try out.
Til next time, keepin' it crafty!
I'm baaaaccckkkkk with four new cards designed from Card Sketches I found on the blogisphere! Here are the cards:
The first one is probably my favorite. Mahalo! This is from the Paper Craft Crew Card Sketch #56 (PCCCS56).
It's the perfect sketch to use some of those "inchies" I've had for, like, forever! I also used the palm tree from Balmy Breezes (Stampin' Up) and made my own word stamp using the letters from a new Mama Elephant set called Bella Letters.
Next up is Happy Birthday. This was derived from Paper Craft Crew Card Sketch #55 (PCCCS55).
I love the little piece of vellum which just softens the background. I used a vellum tag for the sentiment and added some black "bling" for a little pop!
This next one, Sending Good Thoughts, is from Sketch #119 over at the Atlantic Hearts Challenge Blog.
Very simple card. Doesn't take a lot of supplies and comes together quickly.
And the final card is Woof! This sketch is from the August 2015 Week 1 Sketch at Viva La Verve.
I saw the background paper in a pad and it just cried bandana and denim. The dog is from You Make My Tail Wag (My Favorite Things), and the pocket is a very old stamp that I bought so many years ago, I don't even know the manufacturer. But I love it. The inside of the card says "Be the person your dog thinks you are."
Here are the four sketches in case you want to play along!
I hope to be back soon with some more inspiration. I have a couple more new sketches I want to try out.
Til next time, keepin' it crafty!
New GrandBaby for Me and New Projects for The Robin's Nest
Normaly my post would have gone up at 3AM today, but since my third granddaughter decided to make a two week early appearance, my schedule went kaput! lol But she is a beauty, so all is well. May I introduce you to Kennadie Anne.
The Robin's Nest Projects
So I whipped up a couple of cards that can be used for pretty much any occasion since I left the sentiments off. They feature a beautiful piece of cardstock from The Robin's Nest. It's called Pink Coral. And if you would like to see a bunch more pictures of this project and detailed instructions on how they were made, head on over to Chattering Robin's and check them out!!!
Til next time, keepin' it crafty!
The Robin's Nest Projects
So I whipped up a couple of cards that can be used for pretty much any occasion since I left the sentiments off. They feature a beautiful piece of cardstock from The Robin's Nest. It's called Pink Coral. And if you would like to see a bunch more pictures of this project and detailed instructions on how they were made, head on over to Chattering Robin's and check them out!!!
Til next time, keepin' it crafty!
Boots!!!!
I'm posting today for The Robin's Nest, so I hope you join us there!
I woke up at 4AM with this card idea and sketched it on my iPad so my feeble brain would remember it when I had time to do my project! I love how it turned out!
Now tell me, is that paper not the PERFECT pattern for those boots? If you would like the full details and more photos, head on over to Chattering Robins for my full post. Thanks for letting me share with you. One thing before I go...just want to remind you of the blog hop the end of this month! It will be great fun and I hope you will join us!
Til next time, keepin' it crafty!
The Robin's Nest Supplies Used:
I woke up at 4AM with this card idea and sketched it on my iPad so my feeble brain would remember it when I had time to do my project! I love how it turned out!
Now tell me, is that paper not the PERFECT pattern for those boots? If you would like the full details and more photos, head on over to Chattering Robins for my full post. Thanks for letting me share with you. One thing before I go...just want to remind you of the blog hop the end of this month! It will be great fun and I hope you will join us!
Til next time, keepin' it crafty!
The Robin's Nest Supplies Used:
Other Supplies Used:
Flower Soft (Summer); Silhouette Cameo; Rain Boots svg; Spring Sentiment svg; CriKit pen holder and pen; Rhinestones; Adhesive; Foam Dots; Spectrum Noir Markers (DR6, LG4, CR5); Zig Wink of Stella Pen; White and Silver Cardstock
Light As A Feather
I have a new project on the Chattering Robin's Blog today featuring some of their beautiful glittered cardstock.
I love how the blues are so striking against the glittered cardstock and white background.
These cards were so quick and easy to do. They make great gifts for shower prizes, hostesses, or for craft fair sales.
If you'd like to see the full post and instructions on making these cards, head on over to the Chattering Robins Blog.
Til next time, keepin' it crafty!
Supplies Used:
I love how the blues are so striking against the glittered cardstock and white background.
These cards were so quick and easy to do. They make great gifts for shower prizes, hostesses, or for craft fair sales.
If you'd like to see the full post and instructions on making these cards, head on over to the Chattering Robins Blog.
Til next time, keepin' it crafty!
Supplies Used:
Other supplies used: Stampin Up Tempting Turquoise Ink, Memento London Fog Ink, Hello Stamp from Rubber Stampede, Congrats Stamp by Koletta Hall, Thank You Stamp from Stampendous, With Kind Thoughts Stamp from Rubber Stampede, White Cardstock, Adhesive.
InLinkz.com
InLinkz.com
Subscribe to:
Posts (Atom)
Saturday Sketch Challenge #748
Happy April, Crafting Friends! I hope your month has started out good and continues in a positive way. I'm back today with another proj...
-
Many people pass through our lives. Some are here for a short time, others for years. Each one is here for a purpose. Some are here to ...
-
Bulletin Board Business Card Holder I know I have been MIA for quite a while. Life sometimes gets in the way. But I couldn't resist...
-
Havin' A Whale of A Time! This week's challenge on Fantabulous Cricut is a shaped card. Don't panic! Shaped cards are incredi...