Hello, Junkies Fans. Where has this summer gone?!! I cannot believe it is already September. But with a new month brings new stamps! And Technique Junkies are celebrating the Fall and Halloween with these NEW RELEASES, with a few other fun stamps thrown in (like Coffee {wink-wink} !!!!) Look what I have for you today!
If you have arrived from the very talented Stephanie Severin, then you are on the right path. If not, you may just want to start at the very BEGINNING so you don't miss any of the wonderful projects shared by the Design Team. And until September 8th, there is a special 15% discount on all the new releases. (And for everything else, see my special code at the end of this post to save 10%.)
Now, let's get on with the fun!!!
First up, I have some really fun Halloween cards to scare, I mean share...they are definitely of the macabre genre. What can I say, I was feeling a little dark (in a playful way) when I did these cards. I posted a list of all the supplies used under each card. Let's get spooky!
TJ PRODUCTS:
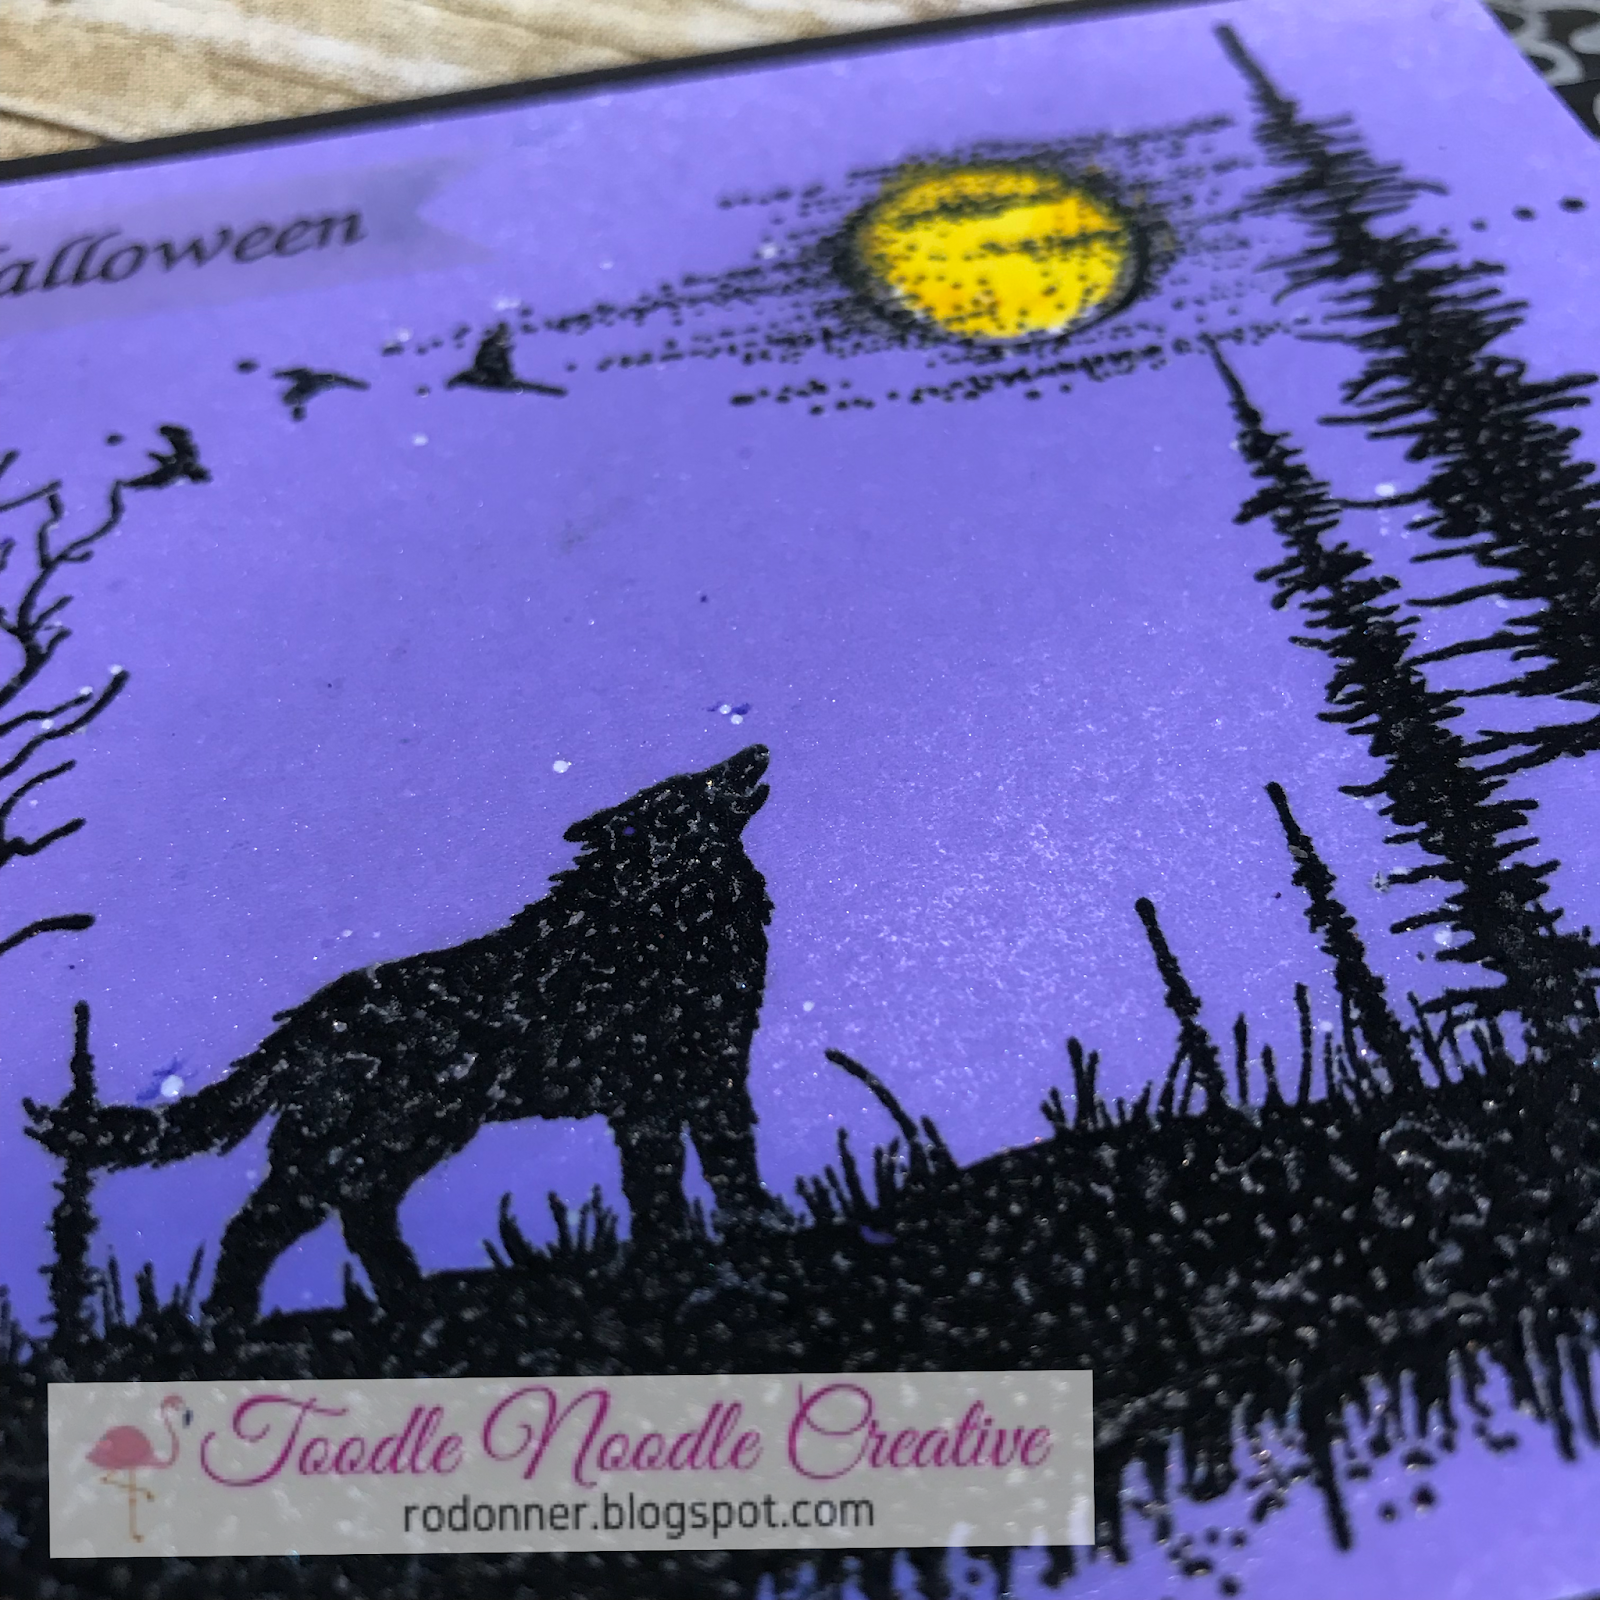
New Release: Wolf By Moonlight
Shimmering Bliss Spray: Mardi Gras
Other Products: Misti
Additional Supplies: Cardstock, Watercolor Pencil, Label Maker (sentiment), Versamark Ink, Adhesive, Clear Embossing Powder, Heat Gun, Washi Tape, Paper Trimmer
The image was stamped onto a piece of cardstock using Versamark ink and then heat embossed with black embossing powder. The moon was colored in with a Watercolor Pencil and blended with water. The Shimmering Bliss was sprayed over the panel. Washi tape was added to the black card base, then the stamped panel was attached. The sentiment was added using a label maker.
TJ PRODUCTS:
New Release: Pile of Skulls
Other Stamps: Skull Frame, Be Scary
Other Products: Misti
Additional Supplies: Cardstock, Memento Ink (Tuxedo Black), Stickles, Adhesive, Versamark Ink, Black Embossing Powder, Heat Gun, Foam Adhesive, Adhesive, Paper Trimmer
The background image was stamped using Versamark ink and heat set with black embossing powder and attached to the card base. On a separate piece of cardstock, the large skull was stamped, embossed and trimmed, as was the sentiment which was mounted with black cardstock. Using red stickles, I added eyes and a border around the large skull, and highlighted the word "scary". Once dry, both pieces were added to the card using foam adhesive.
TJ PRODUCTS:
New Release: Textured Newsprint
Other Stamps: Raven Nevermore
Additional Supplies: Raven SVG, Silhouette Cameo, cardstock, Acrylic Block, Distress Ink (Barn Door), sponge dauber, Memento Ink (Tuxedo Black), Versamark Ink, Black Embossing Powder, Heat Gun, Adhesive, Paper Trimmer
On a cream piece of cardstock, the background image was stamped with Versamark ink and heat embossed with black embossing powder. On a white scrap of cardstock, the sentiment was stamped and embossed. Using a sponge dauber and Distress Ink, I added color to the corners of the background and around the sentiment. The raven was cut from an svg using a Silhouette Cameo. (The newly released Raven Collage would also look awesome using this technique!!) All the pieces were then adhered to a black card base.
And now a couple of beautiful cards that are neither scary nor macabre! This next one is from a new stamp designer for Technique Junkies, Jan Tink. You are going to absolutely LOVE her style!
TJ PRODUCTS:
New Release: Autumn Blessings
Shimmering Bliss: Chestnut Mare, Dragon's Blood, Golden Olivine, Harvest Sunset, Imperial Yellow, Just Squeezed, Worn Saddle
Other Products: Misti
Additional Supplies: Cardstock, Glass Mat, Paintbrush, Versamark Ink, Black Embossing Powder, Heat Gun, Watercolor, Adhesive, Paper Trimmer
The image was stamped with Versamark and heat set with black embossing powder. Each color of Shimmering Bliss was sprayed onto a glass mat (or you could use an acrylic block). Using a paint brush, I added color to all the leaves and tree base. The background was filled in with watercolor and then flicked with a darker blue watercolor. The panel was matted with black and adhered to a white card base. It's hard to capture just how shimmery and beautiful this card is IRL. You truly have to see it in person to appreciate it's magnificent shine.
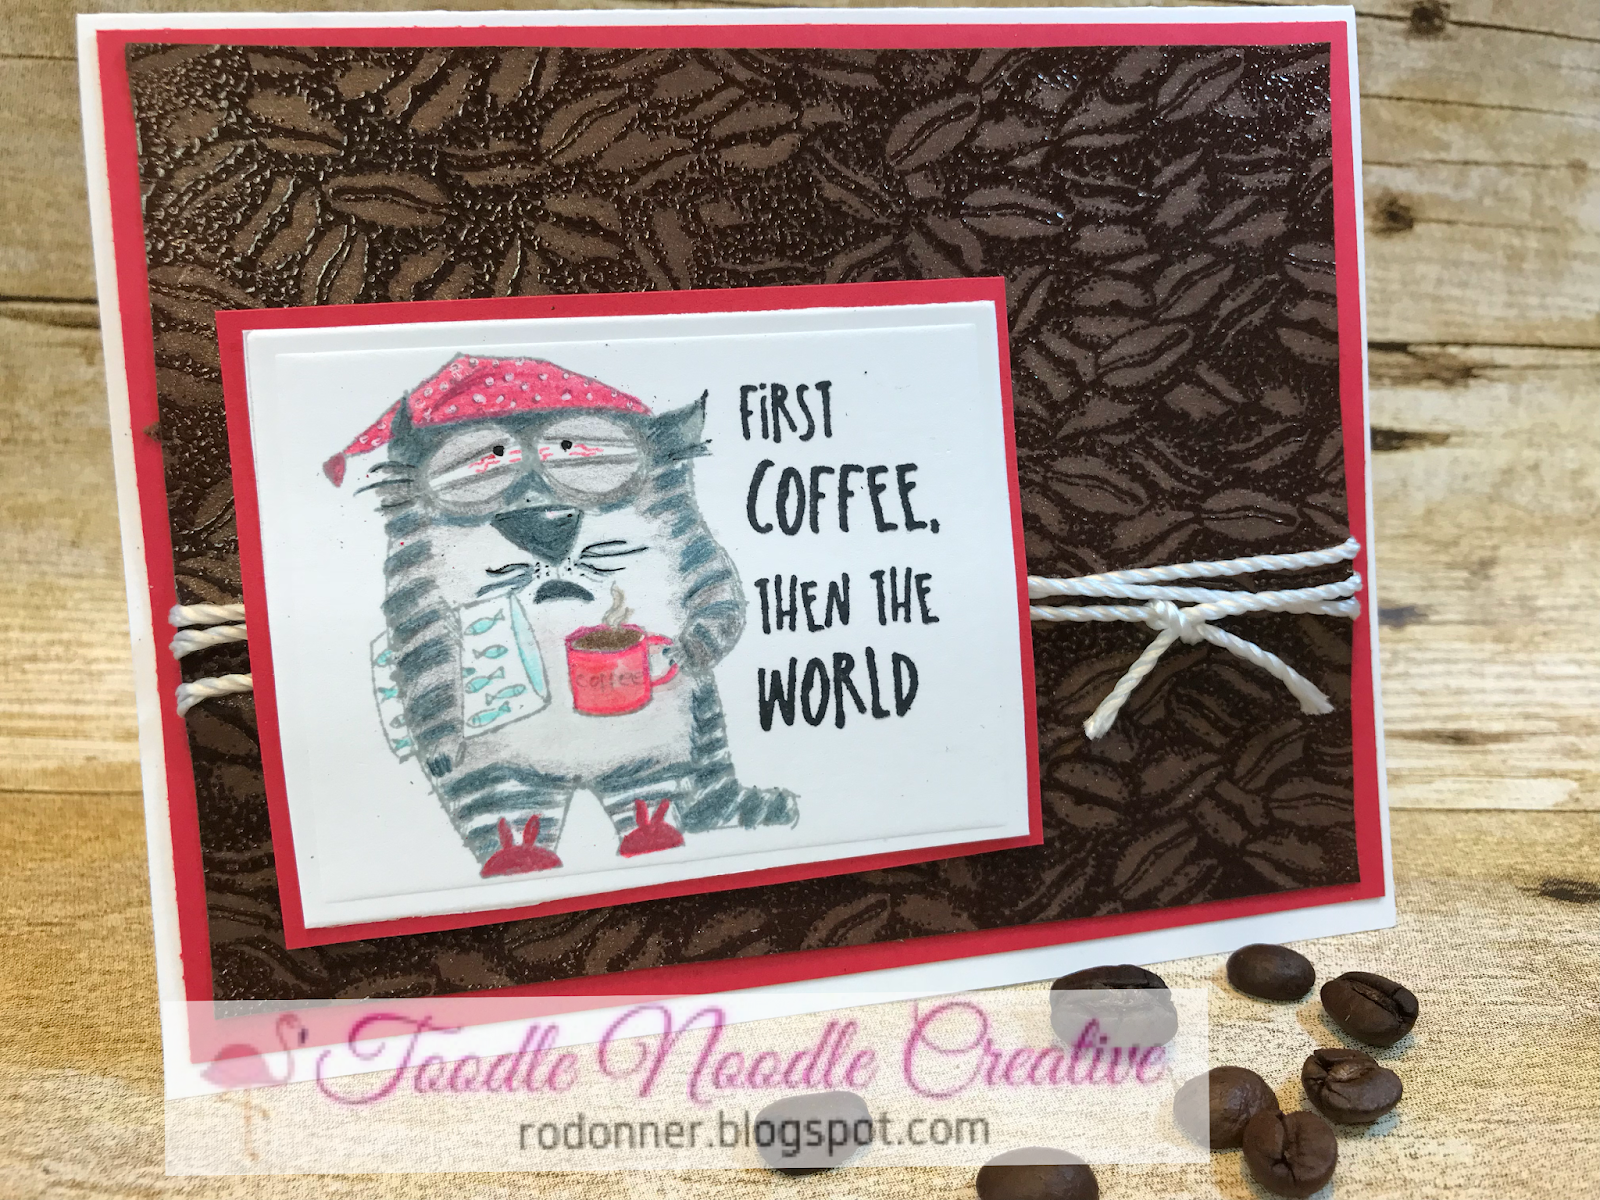
I just LOVE coffee themed cards, and this one was so much fun to create! I added some "bloodshot" to the eyes to mirror how I must look every morning before coffee. lol
TJ PRODUCTS:
New Release: First Coffee, Bunch of Beans
Shimmering Bliss: Chestnut Mare
Other Products: Misti
Additional Supplies: Memento Ink (London Fog and Tuxedo Black), Versamark Ink, Nuvo Embossing Powder (Hot Chocolate), Colored Pencils, Cardstock, Twine, Adhesive, Foam Adhesive, Paper Trimmer, Crystal Adhesive
I stamped the background image on white cardstock using Versamark and heat embossed it. I added Shimmering Bliss spray across the panel and set it aside to dry. I inked up the cat portion of the image using the London Fog and stamped my image utilizing the Misti. I then inked up the other half of the stamp with the Tuxedo Black ink and restamped with the Misti. Using colored pencils, I added some bloodshot lines and colored in the hat, pillow, cup, cat and slippers. I added a little crystal adhesive to the cup for a little shine. Once dry, I trimmed the piece down and matted it with red cardstock. I then trimmed the background piece and also matted it with red cardstock. I then wrapped that piece with twine and adhered the panel to the card base. Using foam adhesive, I added the stamped image panel, finishing off the card.
Well that's all I have for you today. I hope you are enjoying the hop and getting lots of ideas and inspiration. Your next stop along the way is the very fun and creative Judy Jackson. And don't forget about the great discounts! Here are the details:
Til next time,
Keepin' it inky!